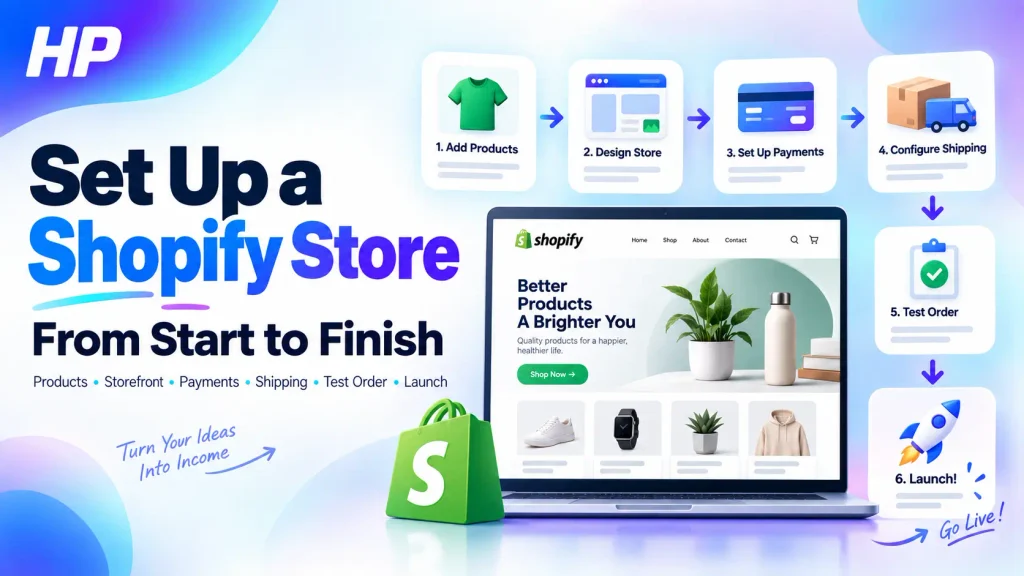
Learning how to set up a Shopify store is not just about choosing a theme and adding products. A store can look finished while shipping, payments, inventory, taxes, or checkout still prevent a customer from ordering.
The safest sequence is to prepare the business details, build the catalog, create the storefront, configure transaction settings, test a complete order, and only then launch.
What You Need Before You Set Up a Shopify Store
Before customizing the storefront, gather the information Shopify will need later:
- Store and legal business name
- Business address and operating country
- Default selling currency
- Product titles, descriptions, images, prices, variants, and inventory
- Product weights if shipping rates depend on weight
- Countries or regions you plan to serve
- Fulfillment and shipping approach
- Business and customer-support email addresses
- Payment-provider information
- Relevant store policies
- A domain or a plan to connect one later
- Basic logo, colors, and brand assets
In Shopify Admin, review Settings → General first. Confirm the store identity, business address, currency, time zone, and weight unit before building dependent settings. Shopify includes these items in its current new-store setup guidance.
You do not need a premium theme, a large app stack, or a finished marketing plan before starting.
How to Set Up a Shopify Store: Build the Foundation and Product Catalog
Start with at least one complete representative product so you have something real to use when testing the storefront and checkout.
- Go to Products and add the product title, description, media, and price.
- Add variants such as size or color where needed.
- Review inventory so stock rules do not accidentally block a purchase.
- Add SKU and weight information where they matter for fulfillment or shipping.
- Confirm the product is published to the intended sales channel.
- Save and preview the product.
Shopify currently manages product details, variants, pricing, availability, and previews from the Products area.
Then go to Products → Collections and group products in a way that helps customers browse the store.
Shopify is replacing its legacy manual and smart collection system with a newer collections model. Stores can therefore show different collection controls during the rollout. Focus on the result: the intended products should appear in the correct collection.
Before moving on, preview a representative product and collection. Confirm the price, variants, inventory state, images, and collection membership are correct.
Turn the Product Catalog Into a Usable Storefront
Open Online Store and review the active theme. Customize it if it supports your requirements, or preview another theme before publishing it. Before significant customization, especially code-level changes, duplicate the theme so you have a recoverable copy. Shopify specifically recommends a duplicate as a backup before theme customization.
Use the theme editor to configure the important customer-facing elements, such as the homepage, header, footer, product templates, collection templates, colors, typography, and calls to action.
Create essential informational pages under Online Store → Pages. Then open Content → Menus and connect customers to your important collections and pages. Content → Menus is Shopify’s current documented navigation path.
A basic customer journey should work without a direct URL:
Homepage → Collection → Product
Preview that path on desktop and mobile. Check menus, variant controls, buttons, and product content on a smaller screen before proceeding.
Configure the Settings That Make Checkout and Orders Work
The storefront is not operational until its transaction settings are connected.
Domain and Customer Email
Go to Settings → Domains to connect an existing custom domain if you use one. Shopify provides a myshopify.com domain during setup, so a custom domain is not required while you build. A third-party domain can take up to 48 hours to become fully live after connection.
Review the customer-facing sender address under Settings → Notifications. If you use a branded address on a third-party domain, complete the authentication Shopify requests so customer emails use the intended sending identity.
Payments
Open Settings → Payments and configure a payment provider available for the country or region where the business operates. Do not assume Shopify Payments or a particular third-party gateway is available everywhere. Shopify directs merchants to choose gateways compatible with their region.
Complete any provider verification before launch.
Shipping, Taxes, and Policies
The shipping path now depends on which Shopify shipping model your store has.
- If your store still uses shipping profiles, go to Settings → Shipping and delivery and configure the relevant zones and rates.
- If Shopify has upgraded your store to shipping options by market, go to Markets → select the market → Shipping and configure the shipping options there.
Shopify says shipping options by market are being rolled out gradually, while most stores currently remain on shipping profiles.
Make sure the intended destination is in an active market where required, and check product weights if you use weight-based shipping.
For taxes, review Settings → Taxes and duties only after determining where your business is actually required to collect tax. Shopify’s settings do not replace jurisdiction-specific tax advice.
Add and review relevant customer policies under Settings → Policies.
Test the Entire Shopify Order Flow Before Launch
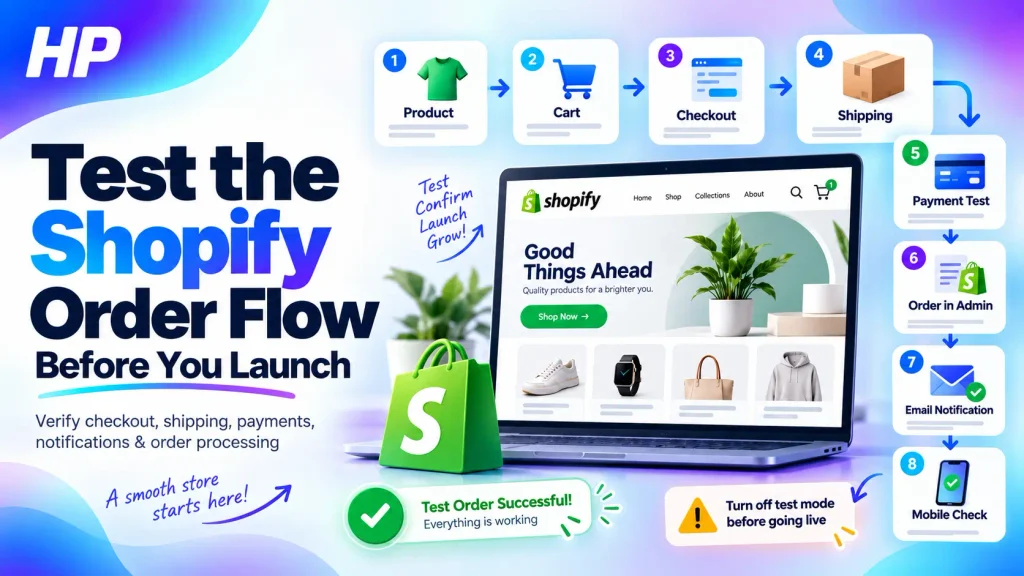
A Shopify store is not ready because the homepage looks complete. Shopify recommends placing at least one test order during setup so you can verify checkout, order processing, inventory, shipping, email notifications, and taxes.
If you use Shopify Payments, the current test-mode path is Settings → Payments → Shopify Payments → Edit → Use test mode. Shopify also supports its Test payment gateway and testing options from some third-party providers. Payment-gateway testing requires a paid plan.
Run this launch check:
- Find a representative product through normal navigation.
- Select the correct variant and add it to the cart.
- Continue to checkout with an address you intend to serve.
- Confirm the expected shipping option and tax behavior.
- Complete a simulated successful payment.
- Test a failed transaction where practical.
- Confirm the order appears correctly in Shopify Admin.
- Check the expected customer notification and fulfillment behavior.
- Repeat the critical path on mobile.
If something fails, troubleshoot the stage that failed. A missing product points to publishing, inventory, collection, or menu settings. No shipping rate points to the destination, market, shipping configuration, or weight. An unavailable payment method points to provider availability, activation, verification, or test mode.
Disable test mode when testing is complete because customers cannot place live orders while the relevant payment provider remains in test mode.
Launch the Store and Run One Final Live Check
Launch only after the test order passes.
Shopify currently requires a subscription plan, a business address in Settings → General, and a payment method with test mode turned off before launch. You can then use Launch store, change Online Store access from Private → Public, or deactivate Private mode under Online Store → Preferences → Store access, depending on the control shown in your admin.
After launch, open the public domain in an incognito or private browser and check:
Homepage → Collection → Product → Cart → Checkout
Confirm the correct domain loads, the store is publicly accessible, and live payment configuration has replaced testing.
If you need help with Shopify implementation, ecommerce website structure, tracking, SEO foundations, or launch QA, Hey Pawan provides direct support from one independent digital marketing professional.
Frequently Asked Questions
Can I set up Shopify without coding?
Yes. Standard store setup and most theme customization can be completed through Shopify’s admin and theme editor. Code is mainly needed when you want changes the available theme settings cannot provide.
Can I change my Shopify theme after launch?
Yes. You can keep other themes in the theme library and publish a different one later. Products, collections, menus, pages, and blog posts are managed separately from the theme, although theme-specific settings need to be configured for the new theme.
Do I need Shopify apps before launching?
Not necessarily. Add an app when a real store requirement is not handled by Shopify’s built-in features or your theme. Avoid installing apps simply because they appear on a generic launch checklist.
Are Shopify test orders charged?
Simulated test orders placed through Shopify’s Test payment gateway or Shopify Payments test mode are not charged. If you use a real payment provider for testing and then cancel or refund the order, payment-processing fees can still apply.
Why might Shopify change the sender address on my store emails?
A branded sender address on a third-party domain may require authentication. If the required authentication is missing, Shopify can rewrite the sender address so messages continue to meet email-provider requirements. Review Settings → Notifications and complete the authentication shown for your domain.
Sources
- Shopify Help Center: General checklist for starting a new Shopify store
General Shopify store checklist - Shopify Help Center: Adding and updating products
Product documentation - Shopify Help Center: Creating collections and adding products
Collections documentation - Shopify Help Center: Customizing and duplicating themes
Theme customization documentation - Shopify Help Center: Menus and links
Menu documentation - Shopify Help Center: Connecting a third-party domain
Domain connection documentation - Shopify Help Center: Setting up your email
Email setup documentation - Shopify Help Center: Payment gateway availability
Payment gateway documentation - Shopify Help Center: Shipping rates and shipping options by market
Shipping-rate documentation - Shopify Help Center: General tax setup
Tax setup documentation - Shopify Help Center: Store policies
Store policy documentation - Shopify Help Center: Test orders and launch preparation
Test-order documentation
Store-launch documentation